Showing 205 items matching all electric trams
-
 Ballarat Tramway Museum
Document - Specification, Melbourne and Metropolitan Tramways Board (MMTB), "Tender Schedule for All-Electric Trams", 1972
... "Tender Schedule for All-Electric Trams"... for All-Electric Trams", published by the Melbourne... "Tender Schedule for All-Electric Trams" Comb bound (white plastic ...Comb bound (white plastic) specification document, approx. 70 pages, with glossy card covers, titled "Tender Schedule for All-Electric Trams", published by the Melbourne and Metropolitan Tramways Board, closing 2 Oct. 1972. Details the conditions of tender, conditions of contract, notes, specification, gives background information about Melbourne, dimensions, performance, drivers and conductors, trucks, wheels, brakes, electrical equipment, control panels and drawings. The drawings give a map of the system, typical city route, Glenferrie Road route (grade diagram), concrete track construction, min. radius curves, loading gauge, all-electric tram and mounting details for the trolley base, schedule of prices, tender form, form of contract, schedule of information to be provided by the tenderer.trams, tramways, specification, tenders, z class trams, mmtb, melbourne -
 Melbourne Tram Museum
Document - Tender Document, Melbourne & Metropolitan Tramways Board (MMTB), "Design, Manufacture and delivery of 100 only all-electric trams", Aug. 1966
... "Design, Manufacture and delivery of 100 only all-electric... Schedule for All-Electric Trams", published by the Melbourne.... "Design, Manufacture and delivery of 100 only all-electric trams ...Comb bound (white plastic) specification or tender document, approx. 70 pages, with glossy card covers, titled "Tender Schedule for All-Electric Trams", published by the Melbourne and Metropolitan Tramways Board, closing 12 September 1966. Details the conditions of tender, conditions of contract, notes, specification, gives background information about Melbourne, dimensions, performance, drivers and conductors, trucks, wheels, brakes, electrical equipment, control panels and drawings. The drawings give a map of the system, typical city route, Glenferrie Road route (grade diagram), concrete track construction, min. radius curves, loading gauge, all-electric tram and mounting details for the trolley base, schedule of prices, tender form, form of contract, schedule of information to be provided by the tenderer. Second copy from same donor added 9-3-2017 See Reg Item 2266 for the 1972 version and 4667 for a draft version - dated June 1965. See Item 4388 for the Z3 document. See Reg Item 4049 for associated newspaper cuttings.In red felt pen on top right hand corner "(1966)". Has stamp "Discarded from PTC Library 22 Oct. 1989" on front cover. 2nd copy has "1966" in ink in top right hand corner.trams, tramways, specification, tenders, z class, mmtb, melbourne -
 Melbourne Tram Museum
Document - Tender Document, Melbourne & Metropolitan Tramways Board (MMTB), "Tender Schedule for All-Electric Trams - Contract 2500", Jul. 1972
... "Tender Schedule for All-Electric Trams - Contract 2500"... Schedule for All-Electric Trams" and "Contract 2500", published... covers, titled "Tender Schedule for All-Electric Trams ...Comb bound (white plastic) specification or tender document, approx. 70 pages, with glossy card covers, titled "Tender Schedule for All-Electric Trams" and "Contract 2500", published by the Melbourne and Metropolitan Tramways Board, closing Monday 2 October 1972. Details the conditions of tender, conditions of contract, notes, specification, gives background information about Melbourne, dimensions, performance, drivers and conductors, trucks, wheels, brakes, electrical equipment, control panels and drawings. The drawings give a map of the system, typical city route, Glenferrie Road route (grade diagram), concrete track construction, min. radius curves, loading gauge, all-electric tram and mounting details for the trolley base, schedule of prices, tender form, form of contract, schedule of information to be provided by the tenderer. On the inside of the cover is a memo from D. Snell, Deputy Chairman to the Testing Engineer, dated 11/7/1972 about the tender being issued, but requesting least publicity and all enquiries to Mr. Snell. Part of the work to tender for the construction of Z class trams. Document scanned to pdf file word searchable. See Item 4388 for the Z3 document and 1583 for an August 1966 version and Reg item 4667 for a draft June 1965 version. 2nd copy added 7/8/2020 from Keith Kings papers.In in pencil in the top right hand corner of cover "1975" crossed out and "1972" written in. On first sheet in pencil, "Howard Smith" and "Laboratory 10 Feb 1975" stamped on.trams, tramways, specification, tenders, z class, mmtb, melbourne -
 Melbourne Tram Museum
Document - Specification, Melbourne & Metropolitan Tramways Board (MMTB), "Design, Manufacture and delivery of 100 only all-electric trams", Jun. 1965
... "Design, Manufacture and delivery of 100 only all-electric..., Manufacture and delivery of 100 only all-electric trams.... radius curves, loading gauge, all-electric tram and mounting ...Specification or Tender Document - titled "Design, Manufacture and delivery of 100 only all-electric trams", and "Background Information and Preliminary Specification", dated June 1965. Bound into a brown foolscap card cover. Details the conditions of tender, conditions of contract, notes, specification, gives background information about Melbourne, dimensions, performance, drivers and conductors, trucks, wheels, brakes, electrical equipment, control panels and drawings. The drawings give a map of the system, typical city route, Glenferrie Road route (grade diagram), concrete track construction, min. radius curves, loading gauge, all-electric tram and mounting details for the trolley base, schedule of prices, tender form, form of contract, schedule of information to be provided by the tenderer. Comprises: 1 - Conditions of Tendering - 1 page 2 - Conditions of Contract - 4 pages 3 - Contents - 3 pages 4 - Notes for prospective tenderers - dated June 1965 5 - General nature of contract - 21 pages 6 - Appendix A - climate data - two sheets 7 - List of 14 appended drawings 8 - O.6887A - cross section of trolley wire 9 - P.13855 - Glenferrie Road, Longitudinal Section 10 - P.13856 - Wattle Park Route 11 - P.13857 - East Preston Route 12 - P13858 - Concrete track construction 13 - P13859 - Open track construction 14 - P.13860 - Paved ballast track construction 15 - P.13887 - Tram Route - locations of substations and section switches 16 - P.13888 - Minimum radius service curves to give minimum clearance between tramcars 17 - P.13889 - Grooved Rail - 102 pounds per yard and tire profile 18 - R10-301 - Loading gauge, proposed electric tramcars 19 - R9706K - Rolling stock data, tramcars 20 - R10306 - Collins Points Shifter - Wiring diagram. 21 - Schedule of data to be supplied by the tenderer 22 - notes on Automatic Points shifters - 2 sheets 23 - Tender prices and delivery periods - 2 sheets. See Reg Item 2266 for the 1972 version and 1583 for the August 1966 version. See Reg Item 4049 for associated newspaper cuttings. See file htd4667i1.pdf for scans of the drawings.In ink in top right hand corner - "Lees"trams, tramways, specification, tenders, z class, mmtb, melbourne -
 Melbourne Tram Museum
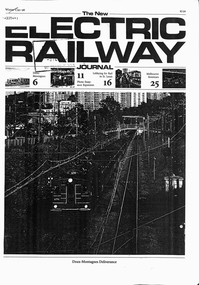
Magazine, The New Electric Railway Journal, "A Fair go for the Streetcar", 1996
... All Electric Trams... study, All electric trams, the Z class. Inclusion within... study, All electric trams, the Z class. Inclusion within the MTA ...Photocopy of a Magazine extract, 7A4 sheets from The New Electric Railway Journal, Winter 1995-96, titled "A Fair go for the Streetcar", written by Michael Venn. Article looks at the influence of Robert Risson, his work, the Melbourne press, the Transportation study, All electric trams, the Z class. Inclusion within the MTA. The Met, light rail, City Circle trams, Fairways, Driver only, the Heritage Fleet and the Hawthorn Depot.trams, tramways, melbourne, transportation plan`, the met, mmtb, all electric trams, fairways, driver only modifications, hawthorn depot -
 Melbourne Tram Museum
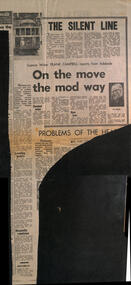
Newspaper, Herald Sun, "The Silent Line", 18-8-1969
... all-electric trams... emphasis was on the future all-electric tram fleet... was on the future all-electric tram fleet that was proposed for Melbourne ...Reports on a Science Congress in Adelaide and a speech by Robert Risson about future transport possible systems - all types such as conveyor belts, air cushion vehicles, magnetic cushions, pneumatic tubes, moving footpaths, jet-propelled vehicles, gas turbine and diesel electric buses. These are known as "gadgetbahns" mooted proposals that seldom come to commercial fruition. His main emphasis was on the future all-electric tram fleet that was proposed for Melbourne. Also notes underground systems such as San Francisco. Item by Science Writer Frank Campbell.Yields information about possible future transport systems - gadgetbahnsNewspaper clipping - "The Silent line" and "On the move the mod way" - The Herald "18-8-1969" tramways, trams, melbourne, public transport, future transport, transport systems, electric trams, all-electric trams, robert risson, gadgetbahns, underground tramways -
 Melbourne Tram Museum
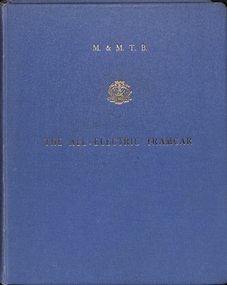
Document - Report, Melbourne & Metropolitan Tramways Board (MMTB), "The All-Electric Tramcar", 1961
... All Electric Trams...Trams tramways MMTB PCC Germany Europe All Electric Trams ...Report - blue Rexene cloth heavy card covers, dark blue glued end sheets, fully sewn bound, with some 9 sections, with many sheets folded and appropriate paper spacing allowed for in the binding. Report titled "MMTB The ALL-ELECTRIC TRAMCAR" with MMTB logo in gold block on front cover and on the side of the report. About 150 pages. Report prepared by Frank R. Kirby Chief Engineer, December 1961. Has a table of Contents, Appendices, figures, tables and photographs. Report looks at the development of All Electric Tramcars in Europe and North America, the cost of maintenance of Melbourne's trams, operating costs, conductors, seated conductors, passenger handling, reliability, speeds, maintenance and capital costs.Has a lable on the first page, "Plan & EPA Library M0036918", Front cover stamped in red "Secretary's Files"trams, tramways, mmtb, pcc, germany, europe, all electric trams, prototype tramcar -
 Melbourne Tram Museum
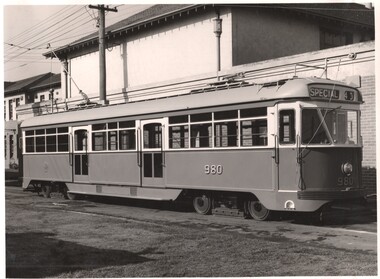
Photograph - Black and White - PCC 980 at Preston Workshops, Sutcliffe Pty Ltd, 1950
... PCC 980 was an all-electric tram prototype built... 980 was an all-electric tram prototype built by the MMTB ...PCC 980 was an all-electric tram prototype built by the MMTB to demonstrate a tram based on a USA design. Only one was built due to import restrictions at the time.Yields information about the tram soon after its completion.Photograph, Black and White, of the PCC 980 at Preston Workshops June 1950. Print and photograph by Sutcliffe of 94 Elizabeth St Melbourne.Has Sutcliffe Pty Ltd stamp on rear - No. 8853. In ink on the rear: "M&MTB PCC-980, Preston W/S June 1950" tramways, tramcars, pcc class, tram 980, preston workshops, new trams, trams -
 Melbourne Tram Museum
Legal record - Contract documentation - Z class, Melbourne & Metropolitan Tramways Board (MMTB), "MMTB Contract No. 2500", 1972 to 1974
... of the Tender Schedule for "100 All-Electric trams" in a back cover... Schedule for "100 All-Electric trams" in a back cover pocket. Has ...Folder prepared by the MMTB Engineering and Stores department to document the tender, the formal tender response from Commonwealth Engineering and then the many letters or clarifications that would form the final contract document for construction of 100 Z class tramcars. See item 2266 for the Tender Schedule.Demonstrates the degree of the negoitation with Commonwealth Engineering and responses for the contract for the Z class tram.Plastic folder with three interscrews containing the contract documentation for the Z class tram. Includes a copy of the Tender Schedule for "100 All-Electric trams" in a back cover pocket. Has "MMTB Contract No. 2500" in gold block on the front. Folder by Arnold's plastics of Sydney."2011.016" in pencil on first sheet.tramways, mmtb, z class, tenders, new trams, comeng, commonwealth engineering, contracts -
 Melbourne Tram Museum
Photograph, Melbourne & Metropolitan Tramways Board (MMTB), Mockup of all electric tram Preston Workshops, c1972
... Mockup of all electric tram Preston Workshops... for the future All Electric tram. The first photo looks... for the future All Electric tram. The first photo looks at the passenger ...Set of two photographs showing parts of the mockup for the future All Electric tram. The first photo looks at the passenger compartment with the conductor's desk and seats. The second photo shows the side view of the driver's compartment with the foot controls, windscreen and seat. The mockup was built at Preston Workshops, 1971. See also items 2502 and 4540 for other photos.Yields information about a mockup at Preston Workshops of an all electric tram body.Photograph black and white printed on plain paper, one with MMTB stamp.melbourne, tramways, mmtb, new trams, mockup, 1041 mock-up -
 Ballarat Tramway Museum
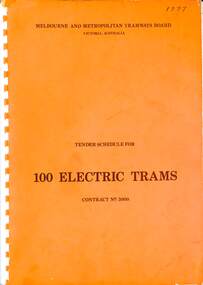
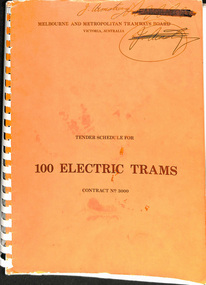
Document, Melbourne and Metropolitan Tramways Board (MMTB), "Tender Schedule for 100 Electric Trams Contract No. 3000", 1977
... , loading gauge, all-electric tram and mounting details.... radius curves, loading gauge, all-electric tram and mounting ...Compiled and published by the Melbourne and Metropolitan Tramways Board, closing Monday 10 May 1977. Details the conditions of tender, conditions of contract, notes, specifications, gives background information about Melbourne, dimensions, performance, drivers and conductors, trucks, wheels, brakes, electrical equipment, control panels and drawings. The drawings give a map of the system, typical city route, Glenferrie Road route (grade diagram), concrete track construction, min. radius curves, loading gauge, all-electric tram and mounting details for the trolley base, schedule of prices, tender form, form of contract, and schedule of information to be provided by the tenderer. Includes an Alphabetical Index. Includes a drawing for a single-ended version of the tramcar. Became the Z3 class following the addition of a rear or 3rd door. Yields information about the 1977 tender for 100 electric tramcars that became the Melbourne Z3 class tram.Comb bound (white plastic) specification or tender document, approx 180 pages, with glossy card orange covers, titled "Tender Schedule for Electric Trams" and "Contract 3000". "1977" on front cover in ink.tramways, tramcars, z3 class, specification, tenders, mmtb, melbourne, single ended tramcars -
 Melbourne Tram Museum
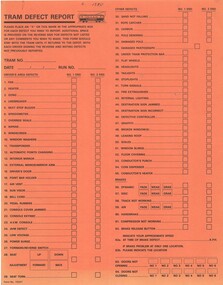
Document - Form/s, The Met, "Tram Defect Report", mid 1980's to mid 1990's
... . Form No. 10247. Appears to be applicable to "All Electric.... Appears to be applicable to "All Electric" trams. Has space ...Set of three "Tram Defect Reports" .1 - Printed on orange card with a centre crease for folding "Tram Defect Report: - mid to late 1980's - mentions AVM's with some 65 defects listed and notes. Has space for Tram Number, Date, Run Number. Form No. 10247. Appears to be applicable to "All Electric" trams. Has space on the rear to record accident damage. .2 - "W class Tram Defect Report" - has spaces for faults, not convectively numbered. Photocopied form on A4 paper.. .3 - "Z, A, B class Tram Defect Report" - photocopied onto white A4 paper..1 "c1980" in ink in top centre. .2 - "Form for crew use at depot's" and "c1995" .3 - "C1995" in top right hand corner.trams, tramways, forms, the met, faults, w class, z class, a class, b class -
 Melbourne Tram Museum
Document - Tender Document, Melbourne & Metropolitan Tramways Board (MMTB), "Tender Schedule for 100 Electric Trams Contract No. 3000", Apr. 1977
... . radius curves, loading gauge, all-electric tram and mounting.... radius curves, loading gauge, all-electric tram and mounting ...Comb bound (white plastic) specification or tender document, approx. 180 pages, with glossy card orange covers, titled "Tender Schedule for Electric Trams" and "Contract 3000". Compiled and published by the Melbourne and Metropolitan Tramways Board, closing Monday 10 May 1977. Details the conditions of tender, conditions of contract, notes, specification, gives background information about Melbourne, dimensions, performance, drivers and conductors, trucks, wheels, brakes, electrical equipment, control panels and drawings. The drawings give a map of the system, typical city route, Glenferrie Road route (grade diagram), concrete track construction, min. radius curves, loading gauge, all-electric tram and mounting details for the trolley base, schedule of prices, tender form, form of contract, schedule of information to be provided by the tenderer. Includes an Alphabetical Index. Includes a drawing for a single ended version of the tramcar. Became the Z3 class. Only the table of contents and the drawings scanned. See Reg Items 1583 and 2266 for other similar documents. See Reg Items 337 and 338 for a report on the operation of single ended tramcars 2 copies held.Has in ink written on front cover "J Armstrong" with a stamp blacked out and other copy of the same signature.trams, tramways, z3 class, specification, tenders, mmtb, melbourne, single ended tramcars -
 Ballarat Tramway Museum
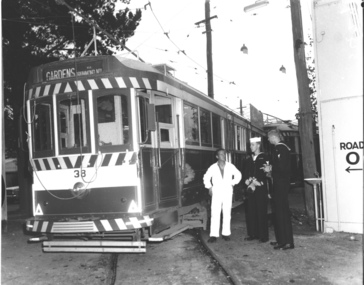
Photograph - Black & White Photograph/s - set of 3, Charles Craig, 1971
... a Everything's under control in my all electric kitchen roof advert... has a Everything's under control in my all electric kitchen ...Yields information about the appearance and use of the Gardens Loop at night.Set of three black and white photographs of No. 43 at the Gardens Loop, Wendouree Parade, at dusk. The tram has a Everything's under control in my all electric kitchen roof advert. Tram has the destination of Mt Pleasant. Photo by Charles Craig - during 1971. trams, tramways, gardens loop, wendouree parade, night photo, tram 43 -
 Ballarat Tramway Museum
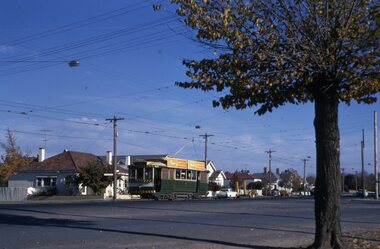
Photograph - Black and White photograph/s - mounted, John Phillips, late 1960's or early 1970's
... under control in my all electric kitchen". Tram 18 has... "Everything's under control in my all electric kitchen". Tram 18 has ...Yields information about the vicinity of the Mt Pleasant terminus.Black and White photograph mounted on heavy cardboard backing. Photo of Ballarat No. 30, 18 and another single trucker, possibly at the Mt Pleasant Terminus. Tram 30 has destination of "Gardens via Drummond North" and a SEC advertisement "Everything's under control in my all electric kitchen". Tram 18 has a advertisement for a Fete on an auxiliary board. Taken by John Phillips late 1960's or early 1970's. Note image scanned in two runs through a scanner, resulting in the shading in the image file. Two copies held to box 01-01-70., added 11/2005.trams, tramways, mt pleasant, tram 30 -
 Ballarat Tramway Museum
Photograph - Black & White Photograph/s - set of 3, Charles Craig, 1971
... in the view and the tram stop signs. Tram fitted with a SEC All... with a SEC All electric cooking roof advert. Tram has ...Yields information about the appearance and use of the Lydiard St terminus at night.Set of three black and white photographs of No.30 at the Lydiard St North terminus at night. Has the tram stop shelter in the view and the tram stop signs. Tram fitted with a SEC All electric cooking roof advert. Tram has the destination of Sebastopol. .1 - photo with shelter in the view - three copies .2 - photo with the terminus and street lights .3 - as for .1, but on the side of the street, has the lights of Ballarat in the view. Photo by Charles Craig - during 1971. trams, tramways, lydiard st north, night photo, tram 30 -
 Melbourne Tram Museum
Photograph - Digital Image, Kevin O'Reilly, looking west over St Kilda Junction from Prahran, Late 1920's
... in photograph. Late 1920's or early 1930's - all tram tracks electric.... in photograph. Late 1920's or early 1930's - all tram tracks electric ...Image from CD (Compact Diskette for use in computers) - see Reg Item 135. Image titled "St Kilda 1" on CD, of looking west over St Kilda Junction from Prahran. Has St Kilda tramway Jtn (St Kilda Road, Fitzroy St, Barkly St, Brighton Road, Wellington St and Punt Road in the photograph, along with St Kilda Railway Station and the "Junction Oval". No trams visible in photograph. Late 1920's or early 1930's - all tram tracks electric.trams, tramways, st kilda junction, st kilda railway station, fitzroy st, brighton rd -
 Melbourne Tram Museum
Document - Folder, Melbourne & Metropolitan Tramways Board (MMTB), "MMTB General Data of Tramcars", compiled to c2005
... R2464 – class Y R2465 – class Y1 R10-946 – All electric tram... – All electric tram – 1041 R11-333 – class Z1 and Z2 trams R11 ...Set of 60 A3 sheets, comprising a folder of GA Drawings – from Keith Kings, held with black plastic semi elastic black clip or retaining strip. All drawings have been scanned (about 50% were already scanned, e.g. the first sheet) and placed on the Depot Tramcar Mechanical component listing. Order of drawings as received has been retained and listed as follows. R1146 – General Data of Tramcars – 24-9-1924 R11-927 – SW6 and W6 – Advertising Panel Location R11-928 – W7 Advertising Panel Location R9529 – Class W7 GA List of Tramcar GA Arrangement Drawings dated 13/12/1974 Cover sheet – “Melbourne and Metropolitan Tramways Board – Electric Tramcars Index - lists Class, numbers and Drawing Nos. R1266 – Cable Train – Dummy and 4 wheel trailer R3799 – Cable train – Dummy & 4 wheel trailer R3422 – Cable train – dummy & Bogie trailer PMTT 161 – Combination Car R3076 – Class A – Combination Car Dropped ends PMTT – 163 - Bogie car with dropped centre compartment PMTT – 700 – Bogie Car with dropped centre compartment and longitudinal rattan saloon seats R3078 – Dropped Centre bogie car – Maximum Traction R4571 – Dog Transport Car – class C converted PMTT 162 – Summer car (old type) – F class PMTT 164 – Summer car – G class R3079 – Class L R7416 – Class L PMTT 160 – Bogie Closed Car – (O class) R9787 – Class G – All night tram style R3077 – Class G – All night tram style R8999 – Class A tramcar Coburg type Original – S class R5963 - Class A tramcar Coburg type Original – S class (modified) R3093A - Class T R4382 – Class T arrangement for one-man operation Car 178 R3756A – class U R2461 – class W – W class converted to W2 R2460 – class W1 R2459 – class W2 R4646 – class SW2 R9525 – class SW2 R3071 – class W3 R3812 – class W4 R4678B – class W5 R9601 – class CW5 R5818 – class SW5 R12-052 – Class W5 – sliding door conversion R4771A – class SW6 (reversible seats) R6408A – class SW6 (Tubular Fixed Seats) R8617 – class SW6 and W6 R9529 – class W7 R10-129 – Class VR car R8332 – PCC type car R2462 – class X R1811 – types of electric cars – class X Safety car R2463 – class X1 R3080 – Class X2 R2464 – class Y R2465 – class Y1 R10-946 – All electric tram – 1041 R11-333 – class Z1 and Z2 trams R11-387 – class z outside dimensions R11-563 – Class Z tram (101-115) R11-580 - class Z3 tram R12-062 – Class A tram T4000-12 – double ended 6 axle articulated LRV – a possibly arrangement R6928 – PCC Car – double end operation R9980 – Freight car 17 – former V class passenger car See Reg Item 5639 for a similar document.trams, tramways, drawings, tramcars, cable trams, tramcar design, preston workshops, mmtb -
 Ballaarat Mechanics' Institute (BMI Ballarat)
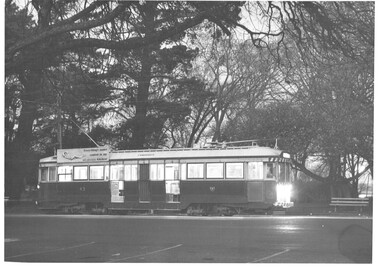
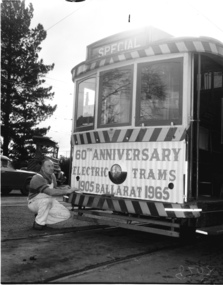
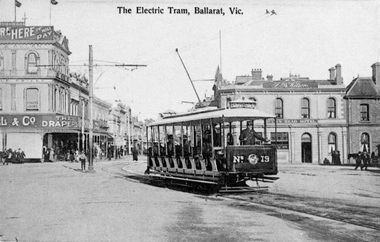
60th Ann of electric Trams
This photograph is from the Max Harris Collection held by the Ballaraat Mechanics' Institute. Please contact BMI for all print and usage inquiries.ballarat, 60th ann, electric trams -
 Ballaarat Mechanics' Institute (BMI Ballarat)
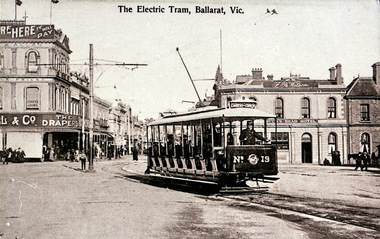
Electric Trams
This photograph is from the Max Harris Collection held by the Ballaraat Mechanics' Institute. Please contact BMI for all print and usage inquiries.ballarat, electric trams -
 Ballaarat Mechanics' Institute (BMI Ballarat)
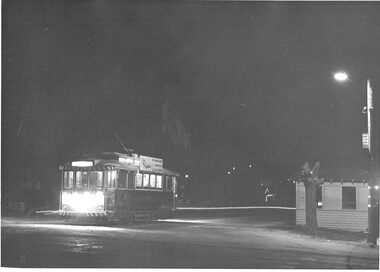
Tram coming out of Bridge St
This photograph is from the Max Harris Collection held by the Ballaraat Mechanics' Institute. Please contact BMI for all print and usage inquiries.ballarat, electric tram, bridge -
 Ballaarat Mechanics' Institute (BMI Ballarat)
Entrance to Bridge St Ballarat & Electric Tram
This photograph is from the Max Harris Collection held by the Ballaraat Mechanics' Institute. Please contact BMI for all print and usage inquiries.ballarat, bridge st, electric tram -
 Victorian Railway History Library
Book, Tramway historical society incorporated, All fares please: A pictorial record of the Christchurch electric railways, 1964
A history of trams in Christchurch - a pictorial and descriptive representation.Ill, maps, p.36.non-fictionA history of trams in Christchurch - a pictorial and descriptive representation.tramways - new zealand, urban transport - new zealand, tramways - christchurch -
 Ballarat Tramway Museum
Slide - 35mm slide/s - set of 4, Noel Simons, Apr. 1967
Set of 2 slides made from the Association of Railway Enthusiast Provincial Tramways film strip, possibly during April 1967. 1192.1 and 1192.3 mounted in Kodak Ready Mounts. The others in plain white mounts. Slides dated Dec. 1968. 1192.1 - No. 21 out bound to Golden Square in High St., between Wattle and Vine Streets. Photo taken after tram has passed photographer. Has a sign for "Reid's Furnituorium" in the background. 1192.2 - Bendigo No. 28 dressed up as Myers Christmas tram, passing the Post Office and Courts in Pall Mall. 1192.3 - Bendigo No. 23 at Needle Loop en route to Eaglehawk. Tram has two SEC roof ads, one "Electric Cooking" and the other "Everything fine in my all electric kitchen". 1192.4 - Bendigo scrubber parked at the end of the main depot lead, alongside the depot office buildings.Details in blue ink, date hand stamped in purple ink. 1192.1 - "No. 21 heads along High St for Golden Square between Wattle and Vine Streets." 1192.2 - "Birney No. 28 in Christmas Garb, traverses Pall Mall en route to North Bendigo". 1192.3 - "No. 23 at Needle Loop on its run to Eaglehawk". 1192.4 - "Scrubber car at Bendigo Depot".tramways, trams, north bendigo, bendigo, bridge st loop, depot, tram 21, tram 23, tram 28, tram scrubber -
 Ballarat Tramway Museum
Slide - 35mm slide/s - set of 20, Noel Simons, 21/05/1971 12:00:00 AM
Set of 20 transparencies taken on 21/5/1971 on Kodak mounts. 1197.1 - Bendigo No. 5 en route to Eaglehawk at Creeth St Long Gully. Tram has a SEC roof ad and Cinzano roof ad. 1197.2 - No 5 approaching Needle Loop between Long Gully and California Gully. On left hand side is the City of Bendigo sign, indicating city boundary. 1197.3 - As for 1197.2 but actually entering loop. Photo taken after tram has passed photographer. 1197.4 - No. 26 bound for Eaglehawk descending the railway bridge near Eaglehawk, at Jobs Gully. 1197.5 - as for 1197.4, but after crossing bridge, now ascending a hill. Photo taken after tram has passed photographer. 1197.6 - No. 26 climbing High St. hill Eaglehawk, nearing end of Double track, bound for Quarry Hill. Shows centre of the road poles. 1197.7 - As for 1197.6, with tram entering single track section. Photo taken after tram has passed photographer. Has a BP service station in the background. 1197.8 - No. 26 (bound for Quarry Hill) crossing No. 17 (Eaglehawk) at Job's Gully Loop. 1197.9 - No. 17 climbing railway bridge at Job's Gully, en route to Eaglehawk. Photo taken after tram has passed photographer. 1197.10 - No.26 bound for Quarry Hill, leaving Long Gully Loop? Has the Creeth St. church in l197.l in the far background. Photo taken after tram has passed photographer. 1197.11 - Tramway Point work at the northern end of Long Gully Loop. 1197.12 - No. 17 en route for Quarry Hill turning into View St. from Bamard St. Tram has SEC roof ads "Everything fine in my all electric Kitchen' and 'Electric Cooking is Matchless'. 1197.13 - as for 1197.12, but tram has turned into View St and about to enter the double line track. Photo taken after tram has passed photographer. 1197.14 - No. 21 enters Nolan St after turning from MacRae St. en route to Bendigo. Note sign on its own post noting tram turns "Beware Tram Turns" and stop sign on adjacent pole "Trams stop on Request". No. 21 has two SEC roof ads. 1197.15 - No. 21 in Nolan St. after turning from Bridge St. (White Hills Road). Note signal light for Bridge St. loop on pole corner of street. Photo taken after tram has passed photographer. 1197.16 - No. 2 bound for Eaglehawk at unknown location. 1197.17 - Tram stop sign on a pole "CARS STOP BY REQUEST" 1197.18 - No. 5 in Carpenter St.? en route to Quarry Hill. 1197.19 - No. 28 has just arrive at Golden Square terminus, passengers are disembarking and the trolley pole is being turned. Golden Square Hotel in the background. 1197.20 - No. 28 at Golden Square terminus. Has a "Nothing beats Briquettes for hear roof ad. Information written on in black ink and date stamped on purple ink. 1197.1 - "No. 5 at Creeth St. Long Gully" 1197.2 - "No. 5 approaching Needle Loop between Long Gully and California Gully" 1197.3 - "No. 5 at Needle Loop between Long Gully and California Gully" 1197.4 - "No. 26 crossing railway bridge at Job's Gully near Eaglehawk" 1197.5 - "No. 26 just after crossing railway bridge at Job's Gully near Eaglehawk/ 1197.6 - "No. 26 in High St. Eaglehawk" 1197.7 - "No. 26 at end of double track in High St. Eaglehawk" 1197.8 - "Nos. 26 and 17 crossing at Job's Gully Loop" 1197.9 - "No. 17 crossing railway bridge at Job's Gully near Eaglehawk". 1197.10 - "No. 26 at Long Gully" 1197.11 - 'Northern end of points at Long Gully Loop". 1197.12 - "No. 17 turning into View St. from Bamard St. Bendigo". 1197.13 -'No. 17 at beginning of double track in View St. after leaving Bamard St. Bendigo. 1197.14 - "No. 21 enters Nolan St. from MacRae St. Bendigo." 1197.15 - "No. 21 in Nolan St. Bendigo just after leaving White Hills Road." 1197.16 - "No. 2" 1197.18 - "No. 5" 1197.19 - "Birney car No. 28 at Golden Square Terminus" 1197.20 "Birney car No. 28 at Golden Square Terminus" tramways, trams, bendigo, long gully, railway bridge, jobs gully, trackwork, nolan st, quarry hill, tram stops, golden square, tram 2, tram 5, tram 17, tram 21, tram 26, tram 28 -
 Ballarat Tramway Museum
Slide - 35mm slide/s - set of 4, Noel Simons, 24/05/1971 12:00:00 AM
Set of 4 transparencies taken on 24/5/1971 on Kodak mounts. 1199.1 - No. 21 in High St. at junction with old High St., near Fire Station Loop. Tram has two SEC roof ads. 1199.2 - No. 21 in High St. between Shamrock and Thistle Sts. Photo taken after the tram has passed the photographer. 1199.3 - Photo of a green box containing timetables for the four Bendigo routes. Located at Charing Cross. 1199.4 - Bendigo No. 23 en route to Eaglehawk at Charing Cross, with two SEC roof ads 'Everything's fine in my all electric kitchen' and "Switch to electric cooking'. Has the Ezywalkin building and the Beehive building in the background. Information written on in black ink and date stamped on purple ink. 1199.1 - "No. 21 in High St. at junction with old High St., near Fire Station Loop." 1199.2 - "No. 21 in High St. between Shamrock and Thistle Sts." 1199.3 - "Bendigo Tramways timetable at Alexandra Fountain Charing Cross." 1199.4 - "No. 23 at Alexandra Fountain Charing Cross, Bendigo." tramways, trams, bendigo, timetables, charing cross, high st., tram 21, tram 23 -
 Ballarat Tramway Museum
Slide - 35mm slide/s - set of 13, Noel Simons, 24/05/1971 12:00:00 AM
Set of 13 transparencies taken on 24/5/1971 on Kodak mounts. 1200.1 - No. 7 en route to Golden Square turning from Bridge St. into Nolan St. Photo taken after tram has passed photographer. Tram has a briquettes roof ad. 1200.2 - No. 21 in McCrae St. just before Nolan St. Photo taken after tram has passed photographer. 1200.3 - No. 7 in Nolan St at corner with McCrae St. Passenger boarding tram at a tram stop. 1200.4 - No 7 turning from Nolan into McCrae St. with Golden Fleece service station in background. 1200.5 - No. 7 in Thunder St en route to North Bendigo. Photo taken after tram has passed photographer. 1200.6 - No. 5 en route to Eaglehawk just after leaving Needle Loop between Long Gully and California Gully. 1200.7 - No. 5 at the start of the double track in High St. Eaglehawk. 1200.8 - No. 5 at Eaglehawk terminus showing "Depot" with Leo A Hughes Photographer advertisement on building in background. 1200.9 - No. 5 at Eaglehawk terminus. Has two SEC roof ads 'Everything's fine in my all electric kitchen' and 'Electricity best for cooking'. 1200.10 - No. 5 at Eaglehawk terminus, with canon, war memorial outside Town Hall and Leo A Hughes Photographer advertisement on building in background. 1200.11 - No. 5 in McCrae St. about to enter Arnold St. and depot. Tram showing depot, has driver changing points. 1200.12 - No. 5 in Arnold St. Photo taken looking up the centre of the access track - shows the overhead at depot junction. 1200.13 - Depot entrance with signage at depot entrance and depot building in background.Information written on in black ink and date stamped on purple ink. 1200.1 - "No. 7 entering Nolan St. from Bridge St." 1200.2 -"No. 21 in McRae St. about to turn into Nolan St." 1200.3 - "No. 7 in Nolan St. at corner of McRae St." 1200.4 - "No. 7 turning from Nolan St. into McRae St." 1200.5 - "No. 7 in Thunder St. just after turning from Caledonia St." 1200.6 - "No. 5 just after leaving Needle Loop between Long Gully and California Gully. 1200.7 - "No. 5 in High St. Eaglehawk at start of double track." 1200.8 - "No. 5 at Eaglehawk terminus" 1200.9 - "No. 5 at Eaglehawk terminus" 1200.10 - "No. 5 at Eaglehawk terminus."\ 1200.11 - "No. 5 in McCrae St. about to enter Arnold St." 1200.12 - "No. 5 in Arnold St." 1200.13 - "Entrance to Bendigo Tram Depot, No. 5 running into shed."tramways, trams, bendigo, mccrae st, north bendigo, california gully, eaglehawk, depot, tram 5, tram 7, tram 21 -
 Ballarat Tramway Museum
Slide - 35mm slide/s - set of 32, Noel Simons, 25/02/1971 12:00:00 AM
Set of 31 transparencies taken on 25/2/1972 on Kodak mounts. 1201.1 - Bendigo No. 26 in Bond St. just after leaving Long Gully en route for Quarry Hill. Has Norris Supermarket in background. Has two SEC roof ads. 1201.2 - No. 26 climbing View St. from Charing Cross en route to Eaglehawk. Has ANZ bank and AMOCO service station in background. 1201.3 - as for 1201.3, but after tram has passed photographer. Has buildings west of Mackenzie St. in photograph. 1201.4 - Tram stop and centre of the road pole with two "CARS STOP BY REQUEST" signs mounted on pole at the corner of Mackenzie St. 1201.5 - same position as for 1201.3, but with No. 5 descending the street. 1201.6 - same position as for 1201.2, but with No. 5 descending the street. Photo taken after tram has passed photographer. 1201.7 - No. 7 in Nolan St. from across the park at Lake Weeroona. 1201.8 - No. 7 entering McCrae St from Nolan St. - distant view. Note "TRAM "sign on left hand side under tree and overhead in McCrae St. from former track that once was in this street. 1201.9 - No. 7 in High St. with Cathedral in background. Tram en route to North Bendigo. Note scaffolding around Cathedral main spire area. 1201.10 - No. 7 crossing Bendigo Creek bridge in High St. near Golden Square. Has a Caltex Service station in the background. 1201.11 - No. 7 at Golden Square terminus with Sunburst Fruit Juices and a Peters Ice cream delivery vans alongside. 1201.12 - as for 1201.11 but photo taken from behind tram, with the end of the rails in the photograph. 1201.13 - No. 7 and 21 in Pall Mall at Charing Cross with No. 5 in the background. Taken some distance away from the location. 1201.14 - No. 7 at Golden Square terminus, taken a short distance from the tram terminus. Shows Milk Bar on right hand side and the hotel on the left hand side. Taken from the south side of the roadway. 1201.15 - as from 1201.14 but taken from the north side of the roadway. 1201.16 - No 5 waiting at California Gully loop. Distant photo showing surrounds 1201.17 - No. 5 en route for Quarry Hill crossing No. 26 at California Gully. 1201.18 - No. 26 at Eaglehawk terminus with Eaglehawk Town Hall and Post Office in background. 1201.19 - No. 21 arriving at Charing Cross en route to North Bendigo. Has Alexandra Fountain in the background, ANZ bank RACV building, and other buildings on the north side of Pall Mall or Nolan St. 1201.20 - No. 26 en route for Quarry Hill at Charing Cross, with crew standing by front door. Has Colonial Mutual life building, Armstrong Tyre Service (Firestone) and a sign for Cohns Drinks in the background. 1201.21 - as for 1201.20 but with No. 5 en route to Eaglehawk now in photograph. 1201.22 - No. 26 at Quarry Hill terminus. 1201.23 - No. 26 at Quarry Hill terminus, view of front portion of tram only from a gate at the Bendigo cemetery. 1201.24 - Track at the end of the Quarry Hill line showing the point blades of the former "Y" terminus and the overhead for this. 1201.25 - No. 2 at the Quarry Hill terminus, looking along the former Trackwork. 1201.26 - as for 1201.25 1201.27 - number not used. 1201.28 - Golden Square terminus from some distance from the actual terminus, showing the Warning sign "TRAM" for motorists from the south. No. 7 at the terminus. 1201.29 - No. 7 passing through the Golden Square shopping centre. Numerous cars and pedestrians. Tram en route for North Bendigo. 1201.30 - No. 7 in High St. Golden Square, en route for North Bendigo. Photo taken after tram has passed photographer. 1201.31 - No. 7 in High St. just past Wattle St. with the Cathedral in the background. Tram has two SEC roof ads good side on photo, 'Everything's fine in my all electric kitchen' and 'Electrical cooking - clean, quick, economical'. 1201.32 - No. 7 in High St. nearing Wattle St. Has Cathedral in the background. Photo taken after tram has passed photographer.Information written on in black ink and date stamped on purple ink. 1201.1 - "No. 26 in Bond St just after leaving Long Gully" 1201.2 - "No. 26 climbing View St. from Charing Cross" 1201.3 - "No. 26 ascending View St. from Charing Cross (At Mackenzie St.)" 1201.4 - "View St. & Mackenzie St." 1201.5 - "No. 5 in View St. near Mackenzie St." 1201.6 - "No. 5 in View St. nearing Charing Cross." 1201.7 - "No. 7 in Nolan St. seen from Lake Weeroona Park." 1201.8 - "No. 7 entering McRae St. from Nolan St. Note "TRAM" warning sign on left. 1201.9 - "No. 7 in High St. passing Short St." 1201.10 - "No. 7 crossing Bendigo Creek bridge in High St. near Golden Square." 1201.11 - "No. 7 at Golden Square terminus" 1201.12 - "No. 7 at Golden Square terminus" 1201.13 - "No 7, 21 and 5 at Charing Cross" 1201.14 - "No. 7 at Golden Square terminus" 1201.15 - "No. 7 at Golden Square terminus" 1201.16 - "No 5 waiting at California Gully loop." 1201.17 - "Nos. 5 and 26 crossing at California Gully loop" 1201.18 - "No. 26 at Eaglehawk terminus" 1201.19 - "No. 21 arriving at Charing Cross from Golden Square" 1201.20 - "No. 26 at Charing Cross" 1201.21 - "Nos. 5 and 26 at Charing Cross." 1201.22 - "No. 26 at Quarry Hill terminus" 1201.23 - "No. 26 at Quarry Hill terminus seen through the gates of the Bendigo Cemetery." 1201.24 - "Quarry Hill terminus showing remains for former double track layout abandoned before 1964." 1201.25 - "No. 2 at Quarry Hill terminus" 1201.26 - "No. 2 at Quarry Hill terminus" 1201.28 - "The Southern approach to Golden Square with No. 7 standing at the terminus, "TRAM" warning sign on the left. 1201.29 - "No. 7 passing through Golden Square Shopping Centre" 1201.30 - "No. 7 in High St. Golden Square" 1201.31 - "No. 7 in High St. passing Wattle St." 1201.32 - "No. 7 in High St. nearing Wattle St."tramways, trams, bendigo, bond st., view st., nolan st., high st., eaglehawk, california gully, charing cross, quarry hill, trackwork, tram 2, tram 5, tram 7, tram 21, tram 26 -
 Ballarat Tramway Museum
Slide - 35mm slide/s - set of 25, Noel Simons, 26/02/1972 12:00:00 AM
Set of 25 transparencies taken on 26/2/1972 on Kodak mounts. 1204.1 - Bendigo No. 5 - just arrived at Manchester Loop near Havilah Road, Long Gully. Photo taken after tram has passed photographer. 1204.2 - No. 26 in Backhaus St. Long Gully passing William St, en route to Quarry Hill. Photo taken after tram has passed photographer. 1204.3 - No. 5 climbing the High St. Hill Eaglehawk, heading for Quarry Hill with the buildings on the West side of High St. in the background, including the Eaglehawk Town Hall. 1204.4 - as for 1204.3, but tram close up. 1204.5 - as for 1204.3, but after tram has passed photographer. 1204.6 - No. 5 at intersection of Mt Korong Road Ironbark and Calder Highway, with the AMPOL service 'station in the background. Photo taken after tram has passed photographer. 1204.7 - No. 26 en route to Quarry Hill shortly after leaving Needle Loop, passing William St., Long Gully. 1204.8 - No. 5 at California Gully Loop, picking up a passenger, with the shops at Long Gully in the background. Photo taken after tram has passed photographer. 1204.9 - No. 5 in Long Gully, en route to Quarry Hill. Photo taken after tram has passed photographer. 1204.10 - No. 2 at Eaglehawk terminus with the Eaglehawk Town Hall and Post Office in the background. Tram has two SEC roof ads. 1204.11 - No. 2 at Eaglehawk terminus, close up. 1204.12 - as for 1204.11, but through the park gates. 1204.13 - as for 1204.11, but with tram stop shelters in the foreground and buildings on the West side of High St in the background. 1204.14 - No. 2 in Mt. Korong Rd, midway between California Gully Loop and Needle Loop. Photo taken after tram has passed photographer. 1204.15 - No. 5 in Long Gully, en route to Quarry Hill. 1204.16 - as for 1204.15, but with trams departed loop. Has an ESSO service station in the background. 1204.17 - No. 26 leaves Charing Cross up View St.. Photo taken after tram has passed photographer. Has Armstrong Tyre Service, Cohns Drinks ad on a building and the T&G building in the background. Also Firestone ads on the tyre service building. 1204.18 - No. 5 waits at Charing Cross with the Alexandra Fountain in the background. Tram has two SEC roof ads, 'Everything s fine in my all electric kitchen' and 'Electricity Best for Cooking'. Has RACV, Colonial Mutual Life buildings in the background and the planting areas around Charing Cross gardens in the foreground. 1204.19 - No. 21 en route to North Bendigo arrives at Charing Cross, with passengers waiting to board. No. 5 in the background. In the background is the Fountain Gate Plaza building and the City Family Hotel. 1204.20 - as for 1204.19, but with No. 7 en route to Golden Square. 1204.21 - as for 1204.19, but closer up. 1204.22 - as for 1204.18 1204.23 - No. 25 in Nolan St. near the crossing of Bendigo Creek, running a special tram tour. 1204.24 - No. 25 on a special charter, in Weeroona Ave. at Cnr of Caledonia St. passing the Gas works. 1204.25 - Nos. 25 (showing Golden Square), 7 and 26 at Charing Cross. Has fountain in the background.Information written on in blue ink and date stamped on purple ink. 1204.1 - "No. 5 at Manchester Loop, near Havilah Rd. Long Gully." 1204.2 - "No. 26 in Backhaus St. Long Gully passing William St." 1204.3 - "No. 5 in High St. Eaglehawk." 1204.4 - "No. 5 in High St. Eaglehawk." 1204.5 - "No. 5 in High St. Eaglehawk." 1204.6 - "No. 5 in Mt. Korong Rd., Ironbark, passing Calder Highway Junctn." 1204.7 - "No. 26 shortly after leaving Needle Loop, passing William St., Long Gully. No. 5 cresting hill in distance." 1204.8 - "No. 5 at California Gully Loop." 1204.9 - "No. 5 in Long Gully" 1204.10 - "No. 2 at Eaglehawk terminus." 1204.11 - "No. 2 at Eaglehawk terminus." 1204.12 - "No. 2 at Eaglehawk terminus." 1204.13 - "No. 2 at Eaglehawk terminus." 1204.14 - "No. 2 in Mt. Korong Rd, midway between California Gully Loop and Needle Loop. 1204.15 - "Nos. 2 and 26 crossing at Long Gully." 1204.16 - "No. 26 leaves Long Gully loop for Eaglehawk as No. 2 pulls out of the far end towards Bendigo" 1204.17 - "No. 26 beginning the climb up View St. from Charing Cross." 1204.18 - "No. 5 at Charing Cross." 1204.19 - "No 21 arrives at Charing Cross from Golden Square while No. 5 awaits departure time for Eaglehawk." 1204.20 - "Nos. 7, 21, and 2 (behind which is No. 5) at Charing Cross." 1204.21 - "Nos. 7, 21, and 2 at Charing Cross." 1204.22 - "No. 5 at Charing Cross." 1204.23 - "No. 25 in Nolan St. near Bendigo creek crossing" 1204.24 - "No. 25 in Weeroona Ave. at cnr of Caledonia St." 1204.25 - "Nos. 25, 7, 26 and 2 (behind 26) at Charing Cross."tramways, trams, bendigo, eaglehawk, long gully, california gully, charing cross, north bendigo, tram 2, tram 5, tram 7, tram 21, tram 25, tram 26